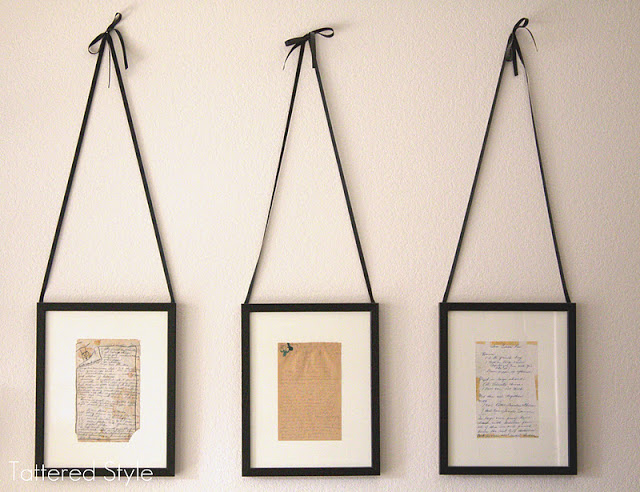
In the last few days, I've received a number of inquiries asking how I put together and hung my mother-in-law's (Nana) treasured recipes. Here, they hang in my breakfast nook as wall art. So today, I thought I would give a quick tutorial of how I assembled and displayed them.
Below is a list of supplies used for the project:
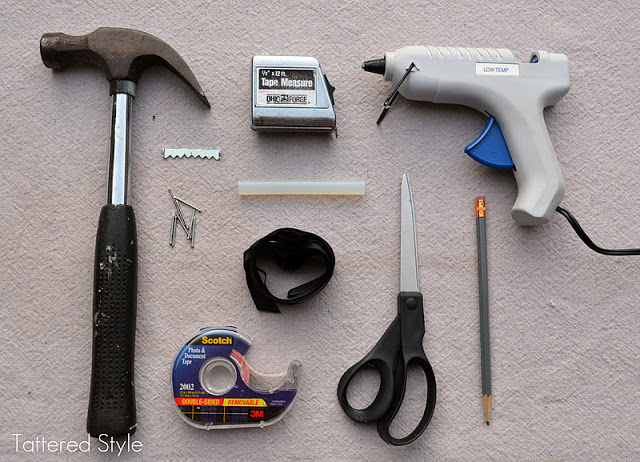
- 3 ~ Treasured Recipes from Nana
- 3 ~ 11" x 14" Ready Made Frames
- Saw Tooth Picture Hangers (included with frame)
- 3 ~ 11" x 14' Mat Boards (not ones with the centers cut out ~ see below)
- Archival, Double-Sided, Removable Tape
- 6 Yards Ribbon
- Hot Glue Gun/Glue Sticks
- Scissors
- Measuring Tape
- Pencil
- Hammer
- Small Nails

To begin with, I determined what size frames to use for the recipes. In my case, I used 11" x 14" frames. I also bought a large mat board and had three 11" x 14" mats cut from it. I did not buy pre-cut mats, I wanted solid mats (not ones with a cut-out) to provide a background for the recipes.

I disassembled the frames and cleaned the glass. I then took the mat board and a recipe, and positioned and marked where I wanted each recipe placed on the board. To preserve the integrity of the recipes, I used archival, double-sided, removable tape to affix the recipe to the mat. I put a 2" strip of tape on the back of each recipe (at the top only) and gently laid it on the mat. When I was happy with the way it was positioned, I pressed the two together.
I then reassembled each frame and attached the saw tooth picture hanger on the back of the frames (the hangers were provided with the frames).
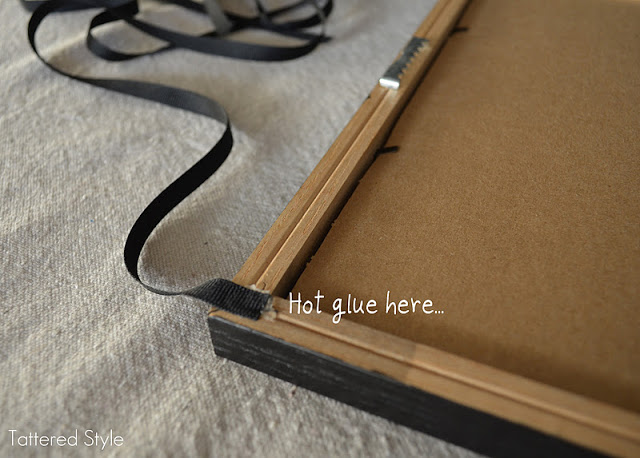
To attach the ribbons, I first decided how long I wanted the ribbons to be. In my case, I cut 2 ~ 36" strips of ribbon for each frame. Next, I hot glued one end of each ribbon to the top corners of the frame. I tied the two ribbons together to form a bow.
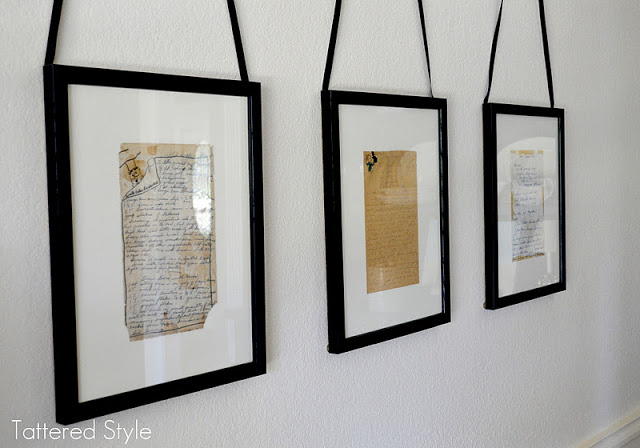
I determined where I wanted each recipe to hang on the wall and then hung them using the saw tooth picture hanger. I did not hang them from the ribbon.

I then pulled the tied ribbon taut and tapped in a nail to hold it in place. It appears the framed recipe is suspended from the ribbon, when actually it is hanging from the saw tooth hanger.