

Ever since I first laid eyes on the incredible rope tiebacks at Restoration Hardware (see below) ~ I've been longing to have them as tiebacks for the drapes in my bedroom. I've been holding off from buying them just because I didn't want to plunk down the cash for them. I finally decided I could probably come up with something similar if I just put my mind to it. Here's what inspired me:

Find it here:
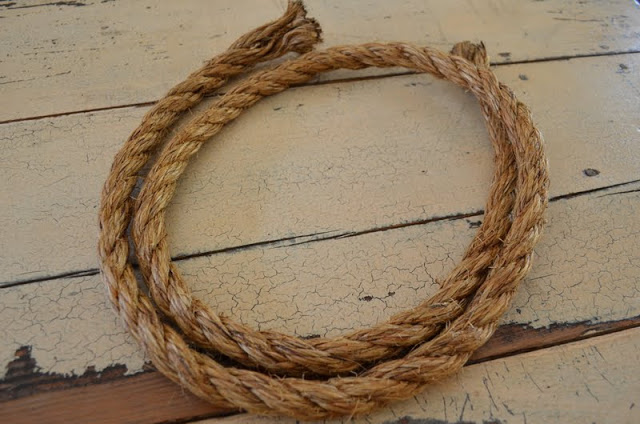
The grounding piece for the whole project was some heavy rope. I found it here. I cut a length of rope into 2 ~ 23" sections.

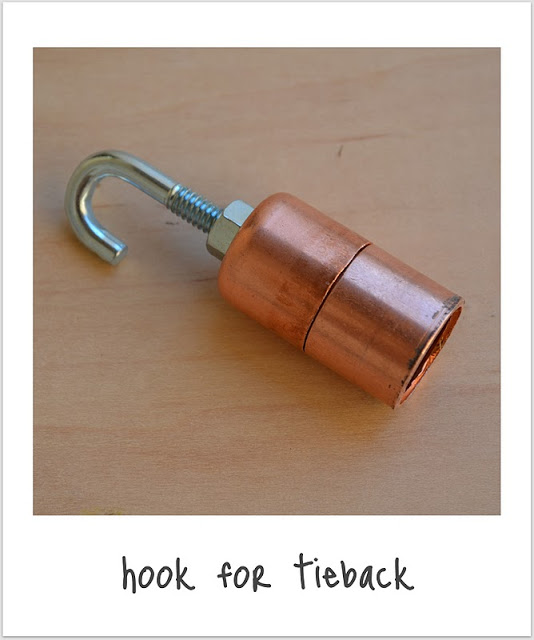
The tricky part was pulling together other items to mimic the hook on the tieback and the ring for the wall. I was able to improvise by using the following objects: 2 hitching post rings, 4 j-bolts, 4 ~ 3/4" copper caps, 2 ~ 3/4" couplings, 8 nuts and 8 wood screws. I found all of these items here.
A friend of mine, Frani, generously helped me with the next part of the project. It required: 1. Cutting the two couplings in half. 2. Drilling a hole (the size of the diameter of the j-bolt) in the end of the copper caps. 3. Inserting the j-bolt into the caps and securing them in place with nuts on each end. 4. Frani cut a smaller piece of copper tubing, the length of the cap and coupling (he did this so the cap and coupling would have something to sit on to hold the two together.
5. Apply Gorilla Glue inside the cap of the copper tube and insert an end of the rope. *Important ~ per Frani's suggestion, I taped off where the rope was inserted into the coupling with some blue painter's tape (see 2 photos below) to keep the glue from oozing out and drying onto the rope. If you've ever worked with Gorilla Glue, you know it expands as it dries and it's killer removing the dried glue. Allow the glue time to dry overnight. This may sound like a lot of work, but it really went pretty fast. I think we completed this part under an hour.
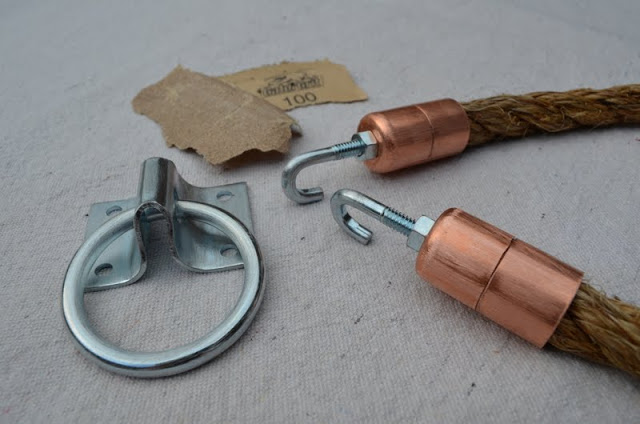
The next day after the glue had dried ~ I roughed up all the metal surfaces so the paint would adhere to the metal. I used 100 grit sandpaper ~ course enough to scuff up the surface, but not too course that it would mar the surface.

The finished length of each tieback is 26" ` from end to end.

The final step was to spray paint the hooks and hitching post rings. With the blue tape still in place, I laid newspaper over the rest of the rope so it wouldn't get any over spray. Then I sprayed several light coats of black satin paint onto the hardware. I opted to spray paint the hardware for my tiebacks with a black satin spray paint because the curtain rods I have in my room are black. The ones from R.H. are in a bronze finish.

Finally, I'm a little impatient and wanted to speed the drying process up a bit, so I put the hardware in a warm oven (200 degrees) and allowed it to "bake" for about 10 minutes.

Here's the final product after I attached the hitching post ring to the wall. I'm pretty excited with the results.

The project took a little time (about 2 1/2 hours) but, in the end, the tiebacks were significantly cheaper than the ones from "you know where" (I really don't want to diss them because they're one of my fave stores!). And, there's something to be said for doing it yourself that's pretty gratifying.
I hope I've made the directions clear ~ if I haven't, leave a comment or shoot me an email and I'll be happy to answer any questions for you. It would make me so happy if you would "Like" Tattered Style's page on Facebook ~ click here to do so. You can also follow my Pinterests here. I hope you have a wonderful weekend.